Using iOS Notes
/iOS has several built-in productivity apps, including Mail, Calendar, Contacts, Reminders, and Notes. Each app is purpose-built to assist its user in keeping up with correspondence, events, tasks, or the never-ending minutiae that than threaten overwhelm even the most organized among us.
What follows applies to Exchange Notes as well as to notes related to the other types of accounts that iPhones, iPads, and iPod Touch devices support.
About Notes
The Notes app is the simplest of these helpful tools. This small program is straightforward; it only does five things.
What it Does

- Open the Notes app.
- Touch New.
- Enter a new note. The first line becomes its title.
- Touch Done. The app returns you to the notes list.
Modify an Existing Note
- Open the Notes app.
- Touch an existing note in the list.
- Tap the body of the note.
- Modify the note.
- Touch Done. The app returns you to the notes list.
Share a Note

Share button (left), Delete button (center), Compose button (right)
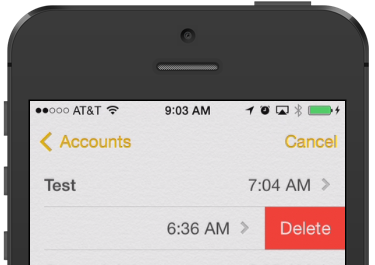
Swipe to delete
- Open the Notes app.
- In the notes list, swipe a note from right to left.
- Touch Delete.
Alternatively, you can open a note and touch the delete button within it.

Pull down the notes list to search
Drag downward in the notes list to reveal a search box. iOS searches note titles and bodies for matching text.
Working with Multiple Notes Lists

Mail, Contacts, Calendars settings
If you use more than one email account online, then it's possible you have added more than one mail account to your iOS device. Further, it is possible that more than one of them has notes. Check your settings to see which ones do. If enabled, notes sync with mail accounts automatically.
- On the iOS Home screen, touch Settings > Mail, Contacts, Calendars.
- Review the list of accounts.
- If necessary, touch an account to see details.
Set a Default Notes List
If you have more than one set of notes on a device, iOS chooses a default list, which you can change. Siri always saves notes to the default list.
- On the iOS Home screen, touch Settings > Notes.
- Touch Default Account.
- Touch an account to set its notes as default.

Default Notes.
Add to a Specific Notes List
- Open the Notes app.
- If necessary, touch Notes in the top left corner to see Accounts.
- Touch the account in which you want to make a new note.
- Touch New.
- Enter a new note.
- Touch Done. The app returns you to the notes list.
If All Notes is selected, iOS adds new notes to the default notes list.
Local Notes
iOS saves notes directly to an iPhone, iPod Touch, or iPad unless a corresponding Mail, Contacts, Calendars account is added and the Notes option is enabled. In the absence of these accounts, new notes will be saved into a local account called "On my iPhone," "On my iPod," or "On my iPad." Local Notes do not sync to any services nor do they sync to other devices.
Move Notes to a New List
iOS doesn't provide a way to take saved notes and move them to another notes list. The simplest way to "move" a note is to copy it and paste it into a new note in the desired account. However, if you have a large number of notes, this won't necessarily be an easy undertaking.
If your goal is to simply extract all the notes from an iOS device to have them in text form on a computer, then perhaps one of the many iOS data recovery apps for Mac or PC might be useful to you. Long, long ago, I used Senuti to recover photos, videos, and music. It worked great, but it doesn't see other iOS data.
I know someone who used DiskAid to extract data from an iPhone, but I haven't used the program other than to test that it is able to read data from iOS, so I cannot vouch for how well it works.